
Bad Oil Pressure Sensor Symptoms vs Real Low Oil Pressure

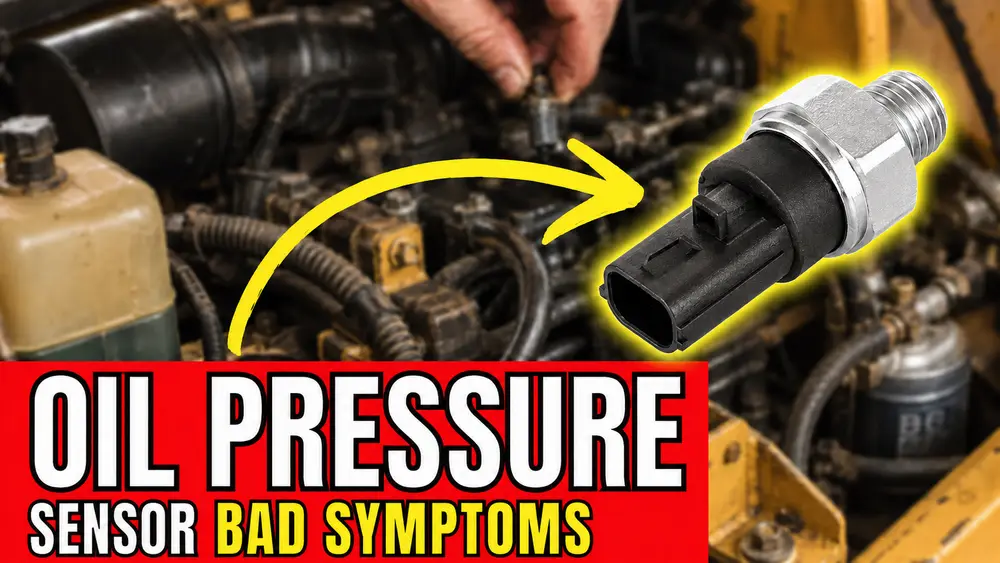
An excavator shows a red oil pressure warning after 30 minutes of work. The engine still sounds normal, so the operator assumes the sensor has failed. That guess can turn a small lubrication fault into an engine rebuild.
The opposite also happens. A tractor has normal oil pressure, but a loose connector makes the gauge fall to zero on rough ground. The best way to separate bad oil pressure sensor symptoms from real low oil pressure is to inspect the circuit and check actual pressure with a mechanical gauge.
Safety first: Treat an oil pressure warning as real until a test proves otherwise. Lower the attachment, park the machine safely, and shut the engine down before checking it.
What the Oil Pressure Sensor Actually Does
The oil pump moves oil through the filter and engine galleries. The sensor reports pressure to the warning lamp, gauge, or engine control module. It does not create pressure and cannot correct a lubrication problem.
Older diesel engines often use a one-wire pressure switch. It changes state at a set pressure and turns a warning lamp on or off. Electronic engines may use a two-wire or three-wire sensor that sends a changing signal to the controller.
A false signal can trigger an alarm, derate, or shutdown on some machines. The sensor itself does not normally cause rough idle or mechanical noise. If the engine runs poorly, test the warning circuit and the engine problem instead of assuming one caused the other.

Bad Oil Pressure Sensor Symptoms vs Real Low Oil Pressure
The warning lamp alone cannot identify the failed part. Use the pattern below to decide where to test first, then compare actual pressure with the specification for the exact engine model.
| Evidence | More Likely Sensor, Connector, or Wiring | More Likely Real Low Oil Pressure |
|---|---|---|
| Gauge behavior | Jumps, pegs high, falls instantly, or changes over bumps | Often falls as the oil becomes hot, though the pattern depends on the fault |
| Diagnostic information | Open circuit, short to ground, short to power, or implausible signal | Pressure-below-limit warning without an electrical circuit fault |
| Harness inspection | Reading changes when the connector or harness moves | Reading stays low while the electrical signal remains stable |
| Engine sound | May sound normal, but sound does not prove pressure is safe | Ticking or knocking raises the risk, but damage can begin before noise appears |
| Mechanical gauge | Meets the OEM limits at the required temperature and speed | Falls below the OEM limit under the stated test conditions |
| Correct next step | Repair the circuit or replace the confirmed failed sensor | Keep the engine off and diagnose the lubrication system |
Many OEM diagnostic systems separate a sensor-circuit fault from a pressure-below-normal fault. A code for high voltage, low voltage, an open circuit, or a short supports an electrical diagnosis. A low-pressure code may describe a real operating condition.
A failed sensor can still send a believable low reading without setting a circuit code. Engine sound also cannot clear the machine. The mechanical gauge remains the deciding test.

5 Bad Oil Pressure Sensor Symptoms
1. The Oil Pressure Gauge Jumps or Bounces
A healthy reading usually changes with engine speed and oil temperature. A needle that moves from normal to zero and back in a split second may indicate a loose terminal, weak ground, damaged wire, or failed sensor. If the reading changes when the machine vibrates, inspect the connector and harness first.
2. The Gauge Stays at Zero or Full Scale
A broken signal wire, corroded connector, or failed sensor can hold the gauge at one extreme. With key-on and engine-off, actual engine oil pressure is zero, although the display may perform a short self-test. A pressure value that remains high after the self-test deserves a circuit check before startup.
A zero reading after the engine starts is more urgent. Do not assume the sender is bad because the engine sounds smooth. Shut down and verify pressure before running it again.
3. The Warning Light Flickers with Vibration
An on-off pressure switch should not flash at random while pressure and engine speed stay stable. Flickering during digging, travel, or movement over rough ground often points toward a loose connector, worn switch contact, or chafed wire. Record whether the warning follows vibration, hot operation, idle speed, or load.
4. Oil Leaks Through the Sensor Body or Connector
The seal between the metal body and plastic connector can fail. Oil may collect around the pins, weaken the connection, and attract dirt. Clean the area before disconnecting the sensor so debris cannot enter the oil port.
Oil at the threads may instead come from the wrong seal, poor installation, or a nearby leak. Find the source before ordering a part. Replace a damaged connector seal when it can no longer keep oil, water, and dirt away from the terminals.
5. The Fault Code and Mechanical Reading Disagree
A controller may report an oil pressure sensor circuit fault while a mechanical gauge shows normal pressure. It may also display zero or an implausible value that does not follow engine speed. This disagreement moves the diagnosis toward the sensor, connector, wiring, ground, or controller input.
Save the full code before clearing it. Record the controller name, engine speed, oil temperature, and warning state. Those details prevent an intermittent fault from disappearing without evidence.
Why Oil Pressure Sensors Fail on Heavy Equipment
Excavators, loaders, tractors, generators, and other off-road machines expose sensors to vibration and heat cycles. Repeated movement can loosen terminals, wear connector pins, and fatigue the sensor diaphragm. A harness without proper support can pull on the connector until a wire breaks inside its insulation.
Water, dust, oil, and cleaning chemicals can enter a damaged connector seal. Road debris, branches, or service tools may strike the sensor or harness. Internal seals also age and allow oil to pass through the sensor body.
Some engines use a screen or restricted passage near the sender. Do not remove, clean, or modify it based on a general online method. Confirm the exact engine design and follow its service procedure because damaged debris screens or blocked galleries can create a new lubrication problem.
Test the Sensor and Confirm Actual Oil Pressure
Follow the same order each time. This protects the engine and stops one quick test from hiding a second fault. Use the operator and service manuals for connector pins, pressure limits, and safe running conditions.
- Secure and stop the machine. Park level, lower all attachments, select neutral or park, apply the parking brake, and shut the engine down. Follow the machine’s lockout procedure before reaching into the engine bay.
- Check the oil before restarting. Wait for the time stated in the manual, then read the dipstick. Look for a level below minimum, overfilling, fuel smell, coolant contamination, foam, sludge, or metal.
- Look for active oil loss. Inspect the filter, drain plug, cooler, hoses, turbocharger oil lines, sensor body, and nearby fittings. Do not restart an engine that has lost a large amount of oil.
- Save codes and operating details. Record warning messages and fault codes before clearing them. Note whether the warning appeared cold, hot, at idle, under load, on a slope, or during vibration.
- Inspect the sensor circuit. Check the connector lock, terminal grip, seals, harness routing, grounds, fuses, and visible splices. Repair damaged wiring before judging the sensor.
- Identify the device and wiring diagram. Confirm whether the engine uses a switch or a variable sensor. Check supply voltage, ground, signal, resistance, or switch state only as the model-specific procedure directs.
- Fit a mechanical oil pressure gauge. Use the approved test port or sensor port, clean fittings, and a gauge with the correct range. Keep the hose clear of belts, fans, exhaust parts, and sharp edges.
- Compare both readings. Test at the oil temperatures and engine speeds listed by the manufacturer. Compare the mechanical gauge with the dashboard or scan-tool value and the OEM minimum pressure.
Unplugging the sensor may make the gauge or warning change, but that does not prove the sensor is faulty. The controller is only reacting to a different circuit state. Finish the electrical checks and mechanical pressure test before replacing the part.
Pressure specifications are not universal. A compact tractor, large excavator, industrial generator, and high-output diesel can use different limits. Ignore general pressure shortcuts and use the specification tied to the engine model and serial range.

Read the Oil Pressure Test Result
Normal mechanical pressure with a low or erratic electronic reading points toward the sensor circuit. Test the connector, signal wire, supply, ground, and controller input. Replace the sensor only when the circuit passes or the sensor fails its specified test.
Low mechanical pressure confirms a lubrication problem. Keep the engine off and move to a low-oil-pressure diagnosis. Low oil level, incorrect or contaminated oil, a restricted filter or pickup, a pressure-control fault, pump wear, and excessive internal clearance belong in that next test path, not in a sensor replacement.
If both readings look normal in the shop, review the saved conditions. Heat, vibration, slope, and load may reveal an intermittent fault. Reproduce it only with an approved test and a technician ready to stop the engine.
Field Example: Oil Pressure Warning After Warm-Up
A wheel loader’s gauge falls to zero when the machine crosses rough ground. The mechanical gauge stays stable, and moving the connector reproduces the dashboard drop. Tightening the loose terminal corrects the fault without replacing the oil pump.
An excavator shows a warning only after the oil reaches operating temperature. Its wiring passes inspection, but the mechanical gauge also falls below the manual’s hot-idle limit. These are not bad oil pressure sensor symptoms, so the machine stays out of service until the lubrication fault is found.
Match the Oil Pressure Sensor Before Ordering
Two sensors can look alike and still send different signals. Match the old part number whenever possible. Confirm the machine model, engine model, serial number, connector shape, pin count, thread, pressure range, and sealing method.
Do not cover a thread-grounded switch with sealing material unless the service instructions allow it. Too much sealant can block the ground path or enter the oil passage. Tighten the replacement to the specified torque because an overtightened housing can crack or distort.
Replace a heat-damaged or oil-soaked connector when its terminals will not lock securely. A new sensor cannot correct high resistance, broken wire strands, or a poor ground in the harness.
Let the Pressure Test Choose the Repair
Bad oil pressure sensor symptoms can light up the dash and stop a job, but they should not start a parts-swapping contest. If the mechanical gauge is low, leave the sensor alone and find the lubrication fault. If pressure is healthy while the dash reading jumps or reacts to vibration, follow the connector, harness, and sensor.
Did the mechanical gauge clear the engine and point back to the sender? Take a look through the Amoparts heavy-equipment sensor range for a matching application. When age, oil, or rust has erased the old number, show our parts team what is still visible: the machine and engine models, serial number, connector, thread, and sensor dimensions can usually tell the rest of the story.


